

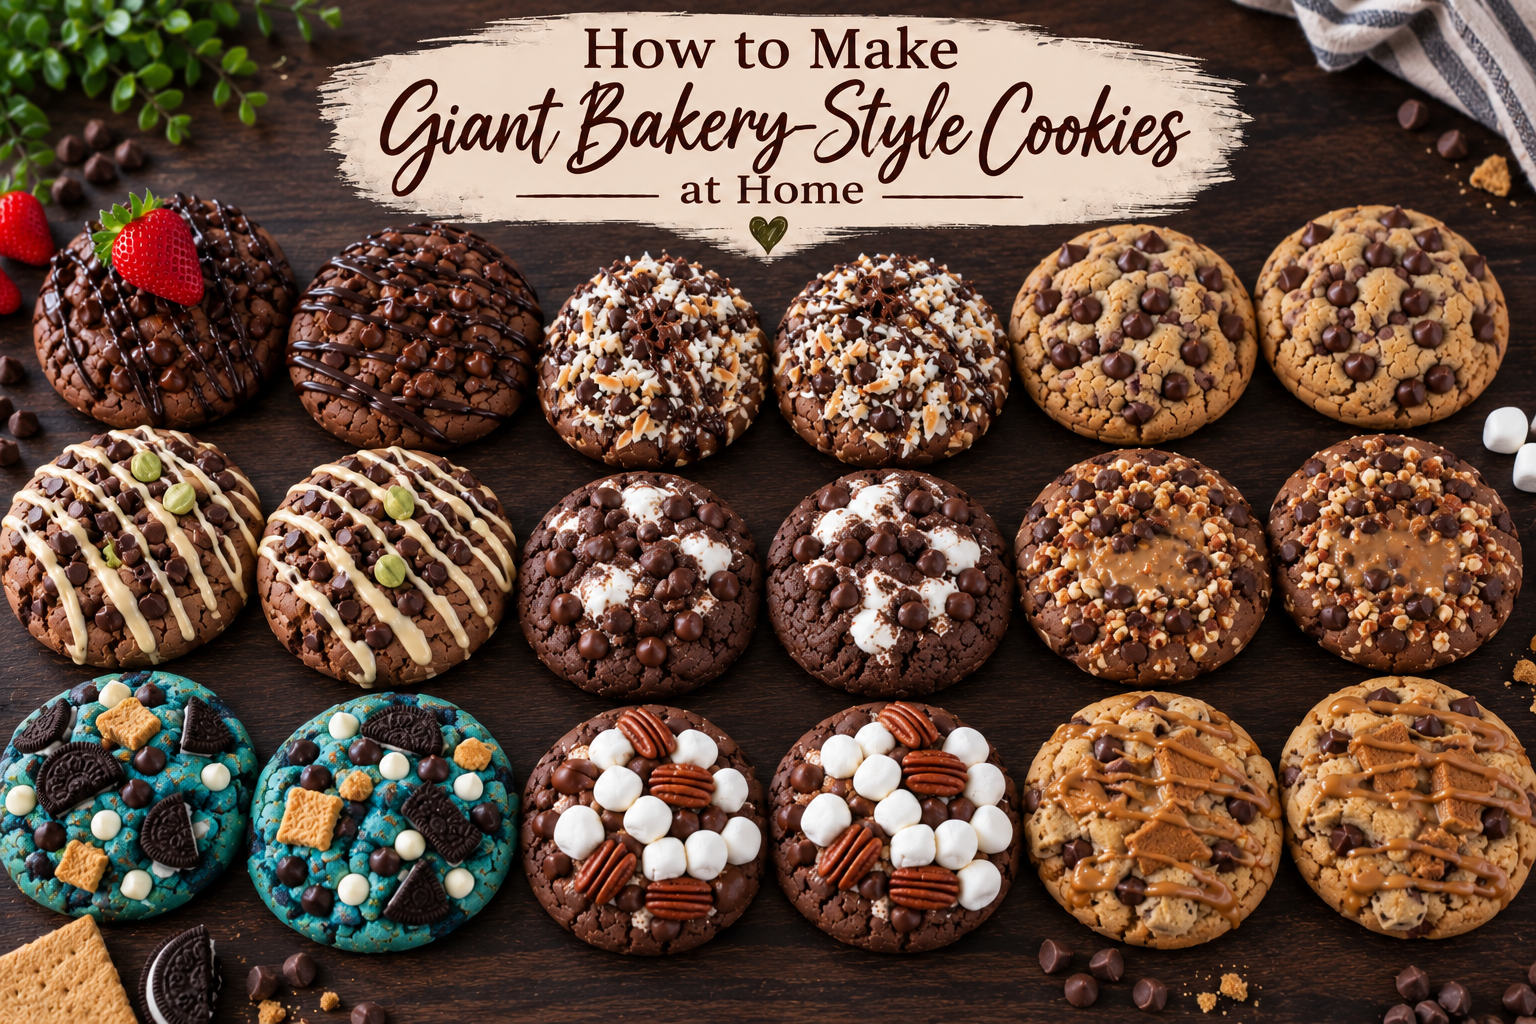
I’ve been making and selling cookies or cookie mixes for more than 25 years, and I started making my extra-large bakery-style cookies about 20 years ago. I’ve always made my cookies a little bigger than normal, but when I started selling them at different venues and markets, I discovered that the really big 5 to 6-ounce cookies did especially well.
Eventually, I settled on about 5 ounces as my favorite size.
For me, it’s the perfect size. There’s enough cookie dough to add all kinds of delicious mix-ins, stuff something completely different into the middle, and pile even more goodies on top.
That’s one of the biggest reasons I love giant cookies more than smaller ones. I can be so much more creative with them.
I actually started out selling my cookie mixes to different shops. A few years later, I began selling my giant cookies at different venues and markets, and that became one of my favorite parts of the whole experience.
We would offer samples, and I absolutely loved watching people’s reactions when they tried one of my cookies.
I love making people happy, and cookies became one little way I could do that.
After making thousands upon thousands of cookies, I’ve learned quite a bit about cookie dough, fillings, baking times, and what works and what definitely doesn’t. I’ve also learned that I really love creating new cookie recipes.
And most of all, I love taste-testing them. LOL.
Unfortunately, I’m a little addicted to my own cookies. I probably needed to choose another career. LOL.
I’ve had a lot of successes over the years, but I’ve had plenty of failures too. I learn something from every success and every failure about what I like, what other people like, and what I might want to change the next time.
This isn’t one particular cookie recipe. It’s the method I’ve developed over years of making giant bakery-style cookies, including how I get them thick and soft, how I work with fillings and toppings, why I always bake one test cookie, and what I’ve learned when a cookie doesn’t turn out quite the way I imagined.
What Makes Bakery-Style Cookies Different?
There isn’t one official size or formula for a bakery-style cookie. Different bakeries make them in all kinds of sizes and styles.
When I talk about bakery-style cookies, I’m talking about the giant cookies I’ve been making for years. Mine are generally about 5 ounces each. They’re thick rather than flat, lightly crisp around the outside, and soft and chewy in the middle.
And they’re big enough to have some fun with.
A smaller cookie is wonderful, but when I have 5 ounces of cookie dough to work with, I have room to be much more creative. I can add chocolate chips, candy pieces, coconut, marshmallows, freeze-dried fruit, crushed cookies, or whatever else I’ve dreamed up.
Then I can put something completely different in the middle.
And if that’s not enough, I can add more on top.
There are three terms you’ll see me use often in my bakery-style cookie recipes:
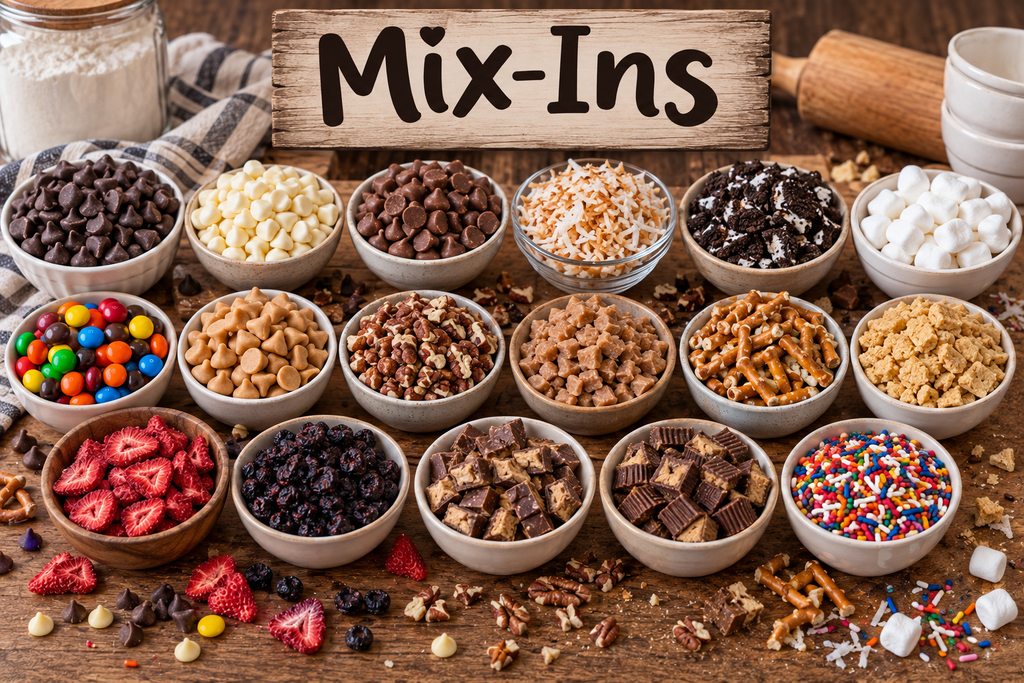
Mix-ins are ingredients mixed directly into the cookie dough. Chocolate chips, coconut, candy pieces, crushed cookies, marshmallows, and freeze-dried fruit are all examples.
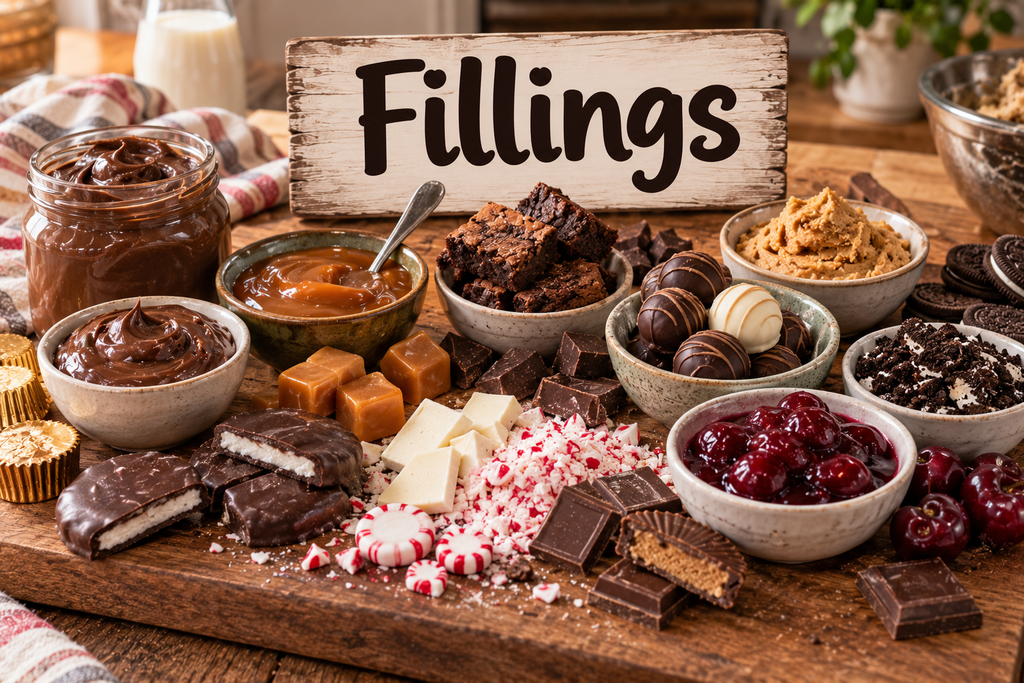
Fillings are placed in the center of the cookie dough. Depending on the recipe, I might use Nutella, caramel, a brownie, a peppermint patty, or a truffle center.
Toppings go on top of the cookie, either before or after baking.
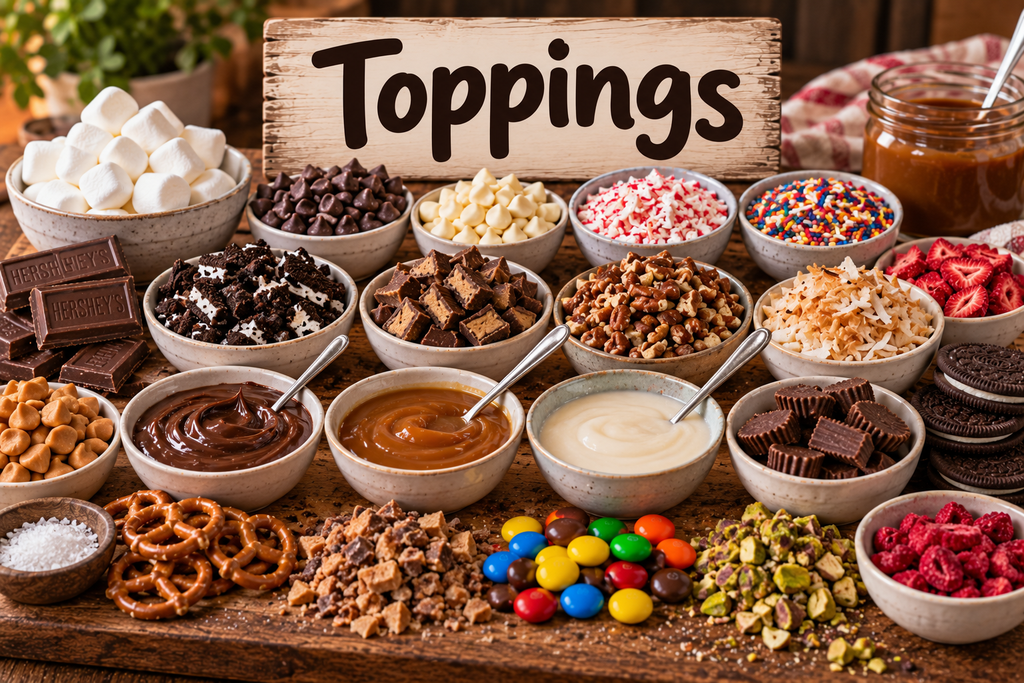
I especially like using toppings that give you a little hint of what you’re about to find inside the cookie.
Once you start looking at a giant cookie as something you can build with different flavors and textures, there are so many possibilities.
My Basic Method for Giant Bakery-Style Cookies
Every cookie recipe is a little different, especially once you start adding ingredients like pumpkin, cocoa, peanut butter, fruit, or fillings.
But there are several things I do consistently when making my bakery-style cookies.
Start With Soft, Workable Dough
One of the first things I pay attention to is the cookie dough itself.
I don’t want it extremely sticky, but I don’t want it dry or crumbly either.
The dough should be soft and pliable while still being able to hold its shape.
That’s one reason you’ll often see a range for the flour in my cookie recipes. I don’t automatically dump in the largest amount.
I start with the lower amount and look at the dough.
If it’s too sticky or isn’t holding its shape, I add a little more flour at a time.
If I accidentally go too far and the dough becomes too dry, I add milk 1 tablespoon at a time until it’s soft and workable again.
It’s easy to add more flour. It’s much harder to take it back out.
Portion the Dough
My giant cookies are generally about 5 ounces each.
I use a 4-tablespoon cookie scoop and usually combine two scoops of dough to make one giant cookie. I also like using a kitchen scale when I want to make sure my cookies are fairly consistent.
They don’t need to weigh exactly 5.000 ounces.
We’re making cookies, not sending them to the moon. LOL.
But keeping them fairly close in size does help them bake at approximately the same rate.
If you put a much smaller cookie on the same baking sheet as several 5-ounce cookies, that little guy is probably going to be finished before the others.
Add the Mix-Ins, Fillings, and Toppings
This is where I get to have fun.
Sometimes a cookie only needs a few good mix-ins.
Other times, I use mix-ins, a filling, and toppings all in the same cookie.
I might have chocolate chips or candy mixed throughout the dough, something completely different hidden in the center, and then extra chocolate or another ingredient pressed onto the top.
Those toppings aren’t just decoration.
I like being able to look at a finished cookie and have some idea of what I’m about to eat.
Why I Always Bake One Test Cookie
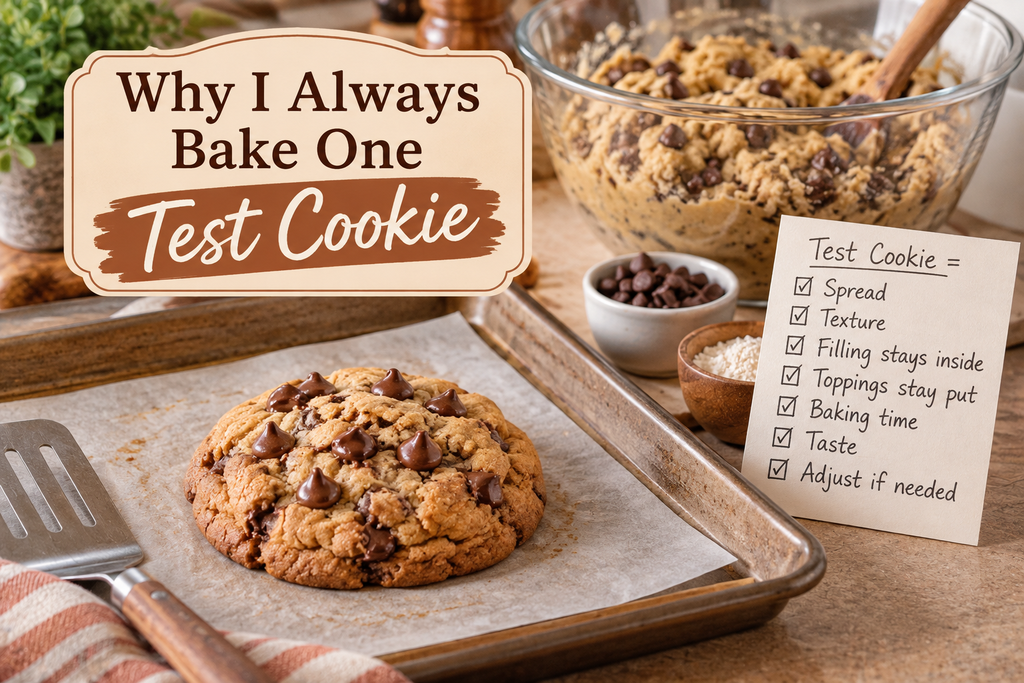
If you remember only one thing from this entire article, make it this:
Bake one test cookie.
Seriously.
I don’t want to put an entire baking sheet full of giant cookies into the oven without knowing how that dough is going to behave.
I’ve created a lot of successful cookies over the years. I’ve also created plenty of failures.
A test cookie gives me a chance to learn from a problem while I can still do something about it.
If my test cookie spreads too much, the dough may need a little more flour.
If it barely spreads and seems dry, I may have added too much flour or need a little more moisture.
If it spreads beautifully and has the texture I want, I don’t change anything.
But I’m looking at more than the spread.
I can check the baking time. I can see whether the filling stays inside or makes a run for freedom. I can find out whether the toppings stay where I put them. I can break the cookie open and look at the center.
And, naturally, I have to taste it.
That’s just good quality control, right?
I can decide whether I want more chocolate, more filling, a little more salt, or something else before I commit to baking the whole batch.
It’s much easier to fix a bowl of dough after one cookie than after an entire pan.
After thousands upon thousands of cookies, that’s one lesson I’m definitely keeping.
How Much Flour Do Bakery-Style Cookies Need?
There isn’t one flour measurement that will work perfectly for every batch of bakery-style cookies.
There are too many variables.
How you measure your flour can make a difference. Eggs aren’t always exactly the same size. Ingredients such as pumpkin add moisture. Cocoa changes the dough. Other wet ingredients can affect the consistency too.
That’s why you’ll sometimes see a flour range in my recipes.
I would much rather have you start with the lower amount and pay attention to the dough than automatically add all the flour and end up with a dry cookie.
My basic rule is:
Start low. Add more if needed.
If your dough is too sticky, add flour gradually.
If you accidentally add too much and the dough becomes dry or crumbly, add milk 1 tablespoon at a time until the dough is soft and workable again.
And before you make any more adjustments?
Bake one test cookie.
I can’t emphasize enough how much one test cookie can help. It’s one of the simplest ways to catch problems before baking an entire batch. I’ve shared more of the lessons I’ve learned over the years in my Tips for the Perfect Cookie guide, including the little adjustments that can make a big difference.
The Best Temperature for Giant Bakery-Style Cookies
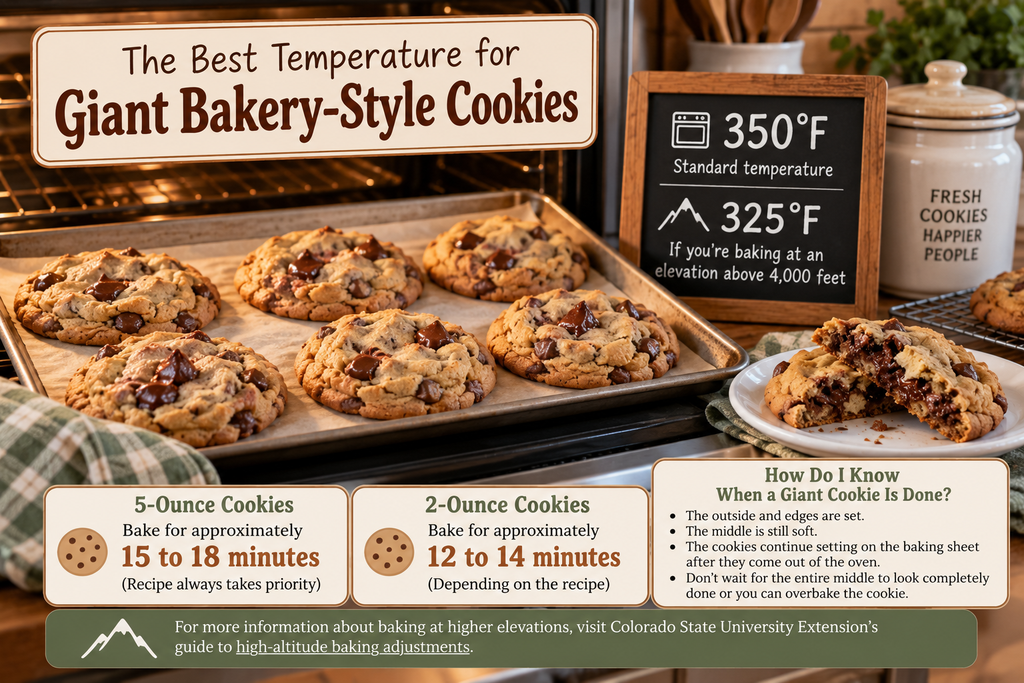
My standard starting point for my cookie recipes is:
Preheat the oven to 350°F. If you’re baking at an elevation above 4,000 feet, try 325°F instead.
I bake at an elevation above 4,000 feet myself, so 325°F often works well for my giant cookies.
Most of my 5-ounce cookies bake for approximately 15 to 18 minutes, although the individual recipe always takes priority. Different ingredients and fillings can change the amount of time a cookie needs.
For regular 2-ounce cookies, the baking time is often closer to 12 to 14 minutes, depending on the recipe.
How Do I Know When a Giant Cookie Is Done?
This can take a little practice because you don’t want to wait until the center of a 5-ounce cookie looks completely firm.
I look for the outside and edges to be set while the middle is still soft.
The cookies continue setting on the baking sheet after they come out of the oven.
If you wait for the entire middle to look completely done while the cookie is still in the oven, you can easily overbake it and lose that soft, chewy center.
If you’re baking at a higher elevation and want to learn more about why baking can behave differently, Colorado State University Extension has helpful information about high-altitude baking adjustments.
How to Keep Bakery-Style Cookies Thick and Soft
There isn’t one magic trick that keeps bakery-style cookies thick and soft.
It’s really several little things working together.
The dough needs the right consistency. You want enough flour for the cookie to hold its shape without adding so much that it becomes dry.
Portioning the cookies consistently helps them bake at about the same rate.
Give giant cookies plenty of room on the baking sheet.
And don’t overbake them.
The center should still be soft when you take the cookies from the oven. Then give them time to finish setting on the baking sheet.
And yes, I’m going to say it again.
Bake a test cookie.
Do I Need to Chill the Dough?
I don’t routinely refrigerate my cookie dough.
You’ll find plenty of cookie recipes that call for chilling, and that may be exactly what those particular recipes need. It just isn’t normally part of the method I use for my giant cookies.
I prefer making a soft, workable dough that can hold its shape without relying on refrigeration.
Of course, if an individual recipe needs refrigeration for a specific reason, follow that recipe.
The important thing is learning what the dough should look and feel like rather than assuming every cookie needs to be made exactly the same way.
How I Make Stuffed Bakery-Style Cookies
Stuffing bakery-style cookies is one of the reasons I love making them so big.
There’s actually room in there!
The basic process is pretty simple.
Prepare your filling first. Flatten your portion of cookie dough, place the filling in the center, and bring the dough completely around it.
Then look carefully at the dough.
You don’t want cracks or openings where the filling can escape.
And trust me, some fillings will find that opening.
Choose the Right Kind of Filling
This is something I’ve learned from experience:
Freezing a filling doesn’t automatically make it suitable for a stuffed cookie.
Caramel is a perfect example.
You can’t take a liquid caramel, freeze it, put it inside your cookie, and expect freezing it to solve the problem.
Even though the caramel starts out frozen, it’s going to melt again as the cookie bakes. If it’s too liquidy, you can end up with a giant mess leaking out of the cookie.
For caramel-filled cookies, I want a soft caramel that still has enough structure to hold up inside the cookie.
I don’t usually want an extremely hard caramel either because that can make the middle of the cookie very chewy.
If you happen to like a really chewy caramel center, though, go for it.
The important thing is understanding what the filling is going to do once it gets hot.
Soft fillings such as Nutella or truffle centers can be much easier to work with after they’ve been frozen because freezing makes them firm enough to wrap in dough.
Other fillings don’t necessarily need to be frozen at all. A brownie piece or peppermint patty already has enough structure to work with.
Whatever filling you choose, completely seal the cookie dough around it. Make sure there aren’t any cracks where the filling can leak out.
Then bake one test cookie before stuffing the rest of the batch.
If that filling is going to escape, I’d much rather find out with one cookie.
How to Make Smaller Cookies From My Giant Cookie Recipes
You don’t have to make my recipes into giant cookies.
My standard giant version is approximately:
5 ounces of dough = about 2 dozen cookies
For regular-size cookies, I generally use approximately:
2 ounces of dough = about 6 dozen cookies
You’ll need to shorten the baking time for smaller cookies, and some fillings may need to be adjusted.
Something that fits beautifully in the center of a 5-ounce cookie may be way too much for a 2-ounce cookie.
You can reduce the amount of filling or leave it out altogether.
You may also want to reduce the toppings so they don’t overwhelm the smaller cookie.
Regular-size cookies are great for parties, cookie trays, gifts, or occasions when you’re serving a lot of people.
But the extra-large version is wonderful when you want the cookie to feel like a special bakery treat.
And I’ll admit it.
I’ll almost always choose the giant one.
My Favorite Bakery-Style Cookie Mix-Ins and Fillings
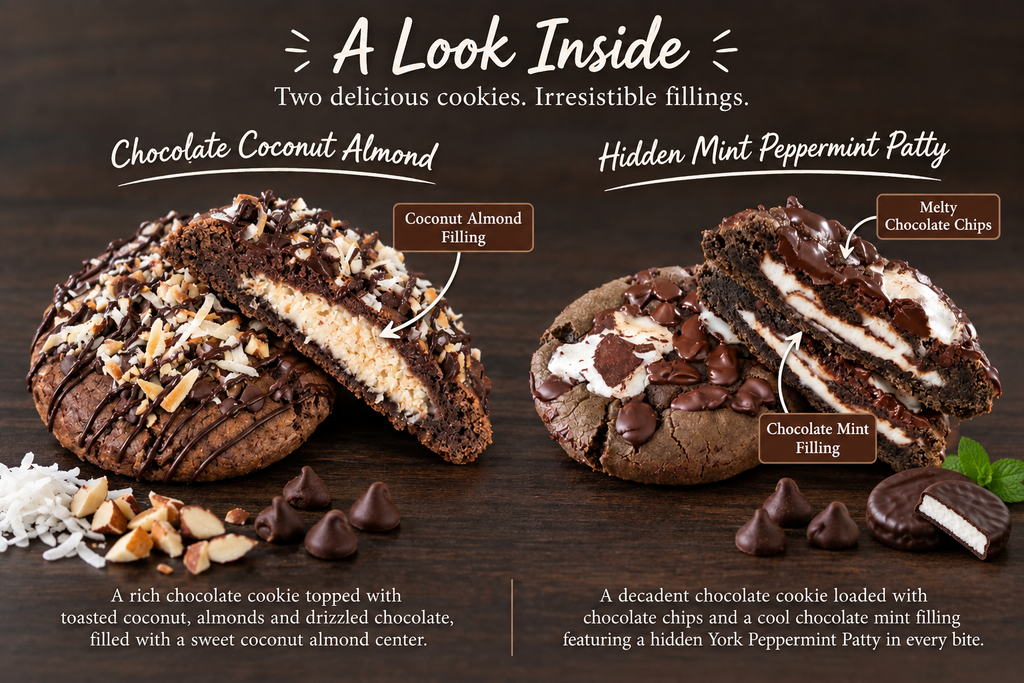
After all these years of creating cookies, this is still one of my favorite parts.
I’ve used chocolate chips, brownies, Nutella, caramel, freeze-dried fruit, marshmallows, coconut, candy pieces, graham crackers, peanut butter cups, crushed cookies, and all kinds of other ingredients in my bakery-style cookies.
Sometimes I’ve even put cookies inside cookies.
Why not?
One thing I’ve learned from developing so many recipes is to think about what makes a particular flavor recognizable.
If I’m making a s’mores cookie, what makes you immediately think of s’mores?
If I’m creating a hot chocolate cookie, what needs to be there for you to take a bite and think, “That’s hot chocolate”?
If I’m turning another dessert into a cookie, what parts of that dessert do I absolutely have to keep?
That’s when creating cookies gets really fun for me.
Not every idea works the first time.
Some of my cookies have turned out beautifully on the first try, and some have definitely not.
But that’s part of creating recipes.
Every success teaches me something, and every failure teaches me something too.
Of course, all of that recipe testing means somebody has to eat the cookies.
It’s a sacrifice I’m apparently willing to make. LOL.
How to Freeze and Reheat Bakery-Style Cookies
One of the nice things about my bakery-style cookies is that they freeze really well.
You can freeze them as raw cookie dough, or you can freeze them after they’re completely baked.
And apparently there’s more than one correct way to eat a frozen cookie in our house.
I like my cookies warm and gooey.
My husband and my sons, on the other hand, love their cookies best straight from the freezer.
I don’t understand it. LOL.
If you’re on my side and want that warm, soft cookie with gooey chocolate and fillings again, you don’t even need to thaw it first.
For a cookie that’s already completely baked and frozen, put the frozen cookie directly into a cold oven. Set the oven to 350°F and let the cookie warm for about 10 to 12 minutes.
I don’t microwave my cookies because I prefer the texture I get from warming them in the oven.
Of course, if you’re like my husband and sons, apparently you can skip all of that and just eat the thing frozen.
Can I Bake Frozen Cookie Dough?
Absolutely.
I’ve baked my bakery-style cookies from raw frozen cookie dough many times.
You don’t need to thaw the dough first.
Bake the frozen cookie dough at the temperature called for in the original recipe, but plan on adding at least 2 minutes to the original baking time.
Because recipes and fillings vary, I still watch that first cookie rather than assuming every frozen cookie will need exactly the same amount of extra time.
There’s that test-cookie rule again.
Bakery-Style Cookie Troubleshooting
I’ve made enough cookies to know that sometimes you pull one out of the oven and think, “Well, that’s not what I pictured.”
Don’t panic.
And don’t bake the other 23 yet.
This is exactly why we made one test cookie.
Why Did My Cookies Spread Too Much?
First, look at your dough.
If it’s very soft or sticky and the test cookie spread much farther than you wanted, try adding a little flour.
Don’t add a huge amount all at once. Add a little, mix it in, and bake another test cookie.
Why Didn’t My Cookies Spread?
You may have too much flour in the dough.
If the dough feels dry or crumbly, add milk 1 tablespoon at a time until it becomes soft and workable again.
Then bake another test cookie.
Why Are My Cookies Dry?
The first two things I’d look at are flour and baking time.
Too much flour can give you a dry cookie, but so can leaving the cookie in the oven too long.
Remember that the center of a giant cookie doesn’t need to look completely firm before you take it out.
Why Did My Stuffed Cookie Leak?
Look at both the filling and the seal.
If there’s a crack or opening in the dough, a soft filling can escape through it.
The filling itself could also be the problem.
A filling that’s too liquidy isn’t necessarily going to stay inside just because you froze it first.
Use a filling with enough structure to hold up as it heats, seal the dough carefully around it, and test one cookie before baking the whole batch.
Why Are My Cookies Raw in the Middle?
There’s a difference between a soft center and a raw center.
A 5-ounce cookie should stay soft in the middle, but it still needs enough time in the oven to bake properly.
If your test cookie really is underbaked, give the next one a little more time and check it again.
That’s another advantage of testing one cookie while you’re figuring out a new recipe.
Frequently Asked Questions About Bakery-Style Cookies
How big is a bakery-style cookie?
There isn’t one official size for bakery-style cookies.
I make mine approximately 5 ounces each because I’ve found that’s the perfect size for adding generous mix-ins, fillings, and toppings.
How many cookies does one recipe make?
Most of my recipes make approximately 2 dozen 5-ounce cookies or about 6 dozen regular-size cookies.
Individual recipes can vary, so always check the recipe you’re making.
Can I make bakery-style cookies without a kitchen scale?
Yes.
I use a 4-tablespoon cookie scoop and generally combine two scoops for one giant cookie.
A kitchen scale is helpful for keeping the cookies consistent, but you don’t have to have one.
Can I make your giant cookies smaller?
Absolutely.
I generally use about 2 ounces of dough for regular-size cookies.
You’ll need to shorten the baking time and may need to reduce or omit larger stuffed centers.
Do I need to chill bakery-style cookie dough?
I don’t routinely chill mine.
I prefer making dough that’s soft and workable but still holds its shape.
If an individual recipe needs refrigeration for a particular reason, follow that recipe.
Why do you bake one test cookie?
Because one cookie can tell me how the entire batch is going to behave.
I can check the spread, texture, baking time, filling, toppings, and flavor and make adjustments while I still have a bowl full of dough to work with.
Can I freeze bakery-style cookies?
Yes.
You can freeze the raw cookie dough or freeze the cookies after they’re fully baked.
If you’re baking the dough from frozen, follow the original recipe but add at least 2 minutes to the baking time.
If the cookies are already baked and frozen, place one directly into a cold oven, set the temperature to 350°F, and warm it for about 10 to 12 minutes.
Or eat it straight from the freezer like my husband and sons do.
Apparently, that’s an option too. LOL.
Why do you bake your cookies at 325°F?
I bake at an elevation above 4,000 feet, and I’ve found that 325°F often works well for my giant cookies.
My standard instructions are:
Preheat the oven to 350°F. If you’re baking at an elevation above 4,000 feet, try 325°F instead.
Start With One of My Bakery-Style Cookie Recipes
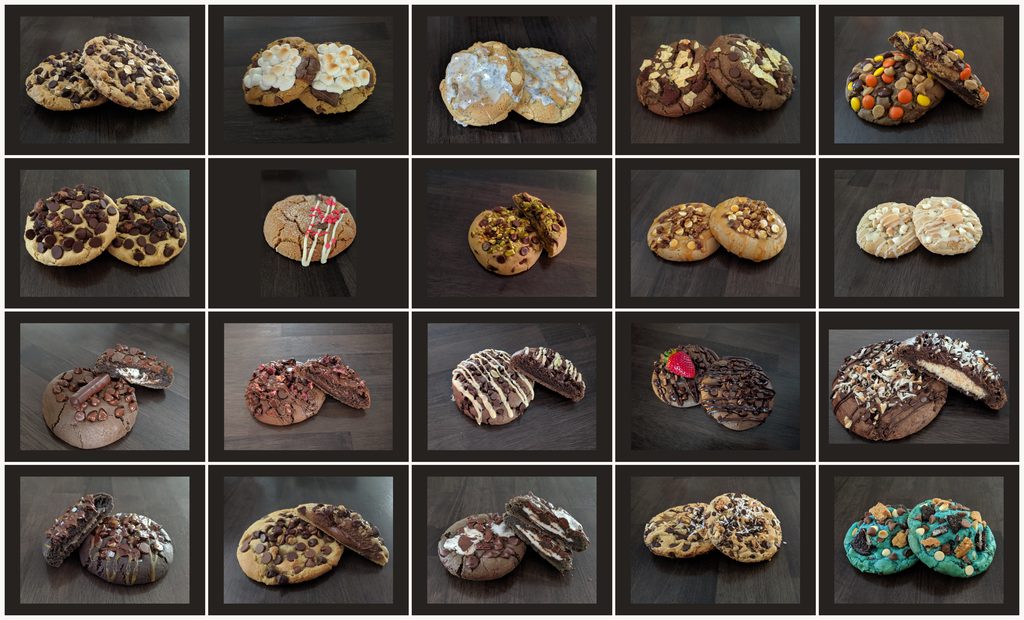
After more than 25 years of making and selling cookie mixes and cookies, I’ve accumulated quite a collection.
If you’re new to giant cookies, my Brown Butter Sea Salt Chocolate Chip Cookies are a good place to start because you can concentrate on getting the size, texture, and baking time right without worrying about a complicated stuffed center.
From there, things can get a lot more interesting.
If you want to take your giant cookies one step further, try adding a filling! Stuffed cookies are some of my favorites to experiment with, but not every filling behaves the same way. I’ve put together a separate Stuffed Cookies Guide where I share what I’ve learned about choosing fillings, keeping them inside the cookies, and avoiding some of the mistakes I’ve made along the way.
My Grant Slammer S’mores Cookies show how much fun you can have with mix-ins and toppings.
Nutella Stuffed Chocolate Chip Cookies are a good way to try working with a frozen soft filling.
Brownie Stuffed Pumpkin Chocolate Chip Cookies use an entirely different type of center.
My Samoa Dream Cookies bring together caramel, coconut, and chocolate, while Chocolate Covered Strawberry Truffle Cookies use freeze-dried fruit and a frozen truffle filling.
And sometimes you don’t need to stuff a cookie with anything.
A giant oatmeal cookie can be pretty wonderful all by itself.
Browse all of my Bakery-Style Cookie Recipes
The Most Important Thing I’ve Learned About Baking Cookies
After more than 25 years of making and selling cookie mixes and cookies, and after making thousands upon thousands of cookies, you’d think I’d have reached the point where every new cookie I dream up works perfectly the first time.
Nope.
I’ve had a lot of successes, and I’ve had a lot of failures.
But I’ve learned something from both.
Every cookie that works teaches me something about flavors, textures, fillings, and what people enjoy. Every cookie that fails gives me another little piece of information to use the next time.
And I still love creating them.
I loved standing at those venues and markets, handing someone a sample and seeing their reaction when they tasted one of my cookies.
There was something really fun about watching a cookie make somebody happy.
That’s still one of the things I love most about baking.
Giant bakery-style cookies may look impressive, especially when they’re loaded with toppings or have something completely different hiding in the middle, but they don’t have to be intimidating.
Start with your dough.
Make one cookie.
Bake it.
Break it open.
And obviously, taste it. That’s very important. LOL.
If something isn’t right, change it and try again.
Bake one test cookie.
It’s a pretty simple rule, but after all these years and all those cookies, it’s still one of the best baking lessons I’ve learned.
And if you happen to become addicted to your own cookies along the way, apparently I can’t help you with that part.
Making every house feel a little more like home.


“If it’s too sticky or isn’t holding its shape, I add a little more flour at a time.”
This is probably the best advice. Flour is so inconsistent that adding a set amount each time — especially by volume — can be disastrous.
I am learning, though. And I love making huge large cookies.
Thanks for an awesome post!